Introduction
When it comes to WordPress Security, there is a variety of things to be done in order to protect your website from spammers, hackers and other vulnerabilities that may affect your eCommerce site, pages, comments or blog. While the WordPress core code is very secure, as it is an Opensource software and is constantly being audited for bugs by hundreds of developers; it should however be made clear that no application is truly 100% Secure. There are many unforeseen factors that can expose your site to malicious vulnerabilities. As such, there is a constant need to keep your site secure.
Does WordPress have any vulnerabilities?
WordPress, like all online/cloud-based applications, has its vulnerabilities. From Poor server configurations, out-of-date Server software, to malicious Backdoors & redirects from third-party plugins and themes, Brute-force Login Attempts, Cross-site Scripting (XSS) to Denial of Service Attacks and everything in-between, there are a lot of vulnerabilities that affect web applications that do not necessarily have anything to do with the WordPress core as a software.
We have Curated a guide to keeping you updated regarding your WordPress security this year:
WordPress Security Guide 2022
- Use a Secure WordPress Host
- Use Latest WordPress, PHP & MySQL Version
- Use strong Usernames and Passwords
- Fortify your WordPress Admin access
- Password Protecting wp-login.php with HTTP Authentication
- Enable Two-Factor Authentication
- Use HTTPS – SSL Certificate
- Use SFTP Encryption to Transfer Files
- Supercharge your wp-config.php file
- Disable the XML-RPC API
- Security through Obscurity: Hide your WordPress Version
- Modify the HTTP Security Headers
- WordPress Security Plugins
- Database Security
- Secure Connections
- File and Server Permissions
- Disable Editing in Dashboard
- Prevent Hotlinking
- Always Take WordPress Backups
- DDoS Protection
Use a Secure WordPress Host
A high-quality web application security that can be used to protect websites, web services and web applications — should have four different layers of security: web application firewall, access control, bot protection, and login protection. Within these 4 Layers of Security is the web server-level security for which your WordPress host is responsible. It is important that you choose a reputable secure host for your WordPress site this will save you a whole lot of trouble irrespective of the cost implication (which is quite minimal, as low as $5/month depending on your choice of WebHost). I would strongly advise against hosting WordPress on your own VPS, however, if that’s the case, then you need to have the Hardware, Software and technical knowledge required to Harden your Server.
Servers hosting WordPress should be constantly updated with the latest operating system and (security) software as well as thoroughly tested and scanned for vulnerabilities and malware. Server-level Web Applications firewalls (WAFs) and Intrusion Detection Systems has to be put in place during the setup of both front and backend.
If you’re on a shared server (hosting other websites including your own) and a website on the same server is compromised, your website can potentially be compromised too even if you follow everything in this guide. That said, some premium host companies use Linux containers (LXC), and LXD to completely isolate not just each account, but each separate WordPress site on the server. Be sure to ask your web host what security precautions they take.
Use the Latest WordPress, PHP & MySQL Versions
The software backbone of WordPress is PHP & MySQL, and as such, ensuring that your server is running on the latest versions is important. Each update fixes bugs and security issues discovered in the previous versions. PHP for example provides 2-year support for its latest release. As of the time of writing, the only supported versions of PHP is v7.4, v8.0 and v8.1; MySQL 5.6 and PHP 7.3 has officially stopped receiving security updates from February 2021 and Dec 2021 respectively; according to WordPress Stats, 53.24% and 56.3% of Servers respectively, are using a less secure version of PHP and MySQL as the backbone of their WordPress Website (PS: only 50.96% of WordPress installs are using the latest version of WordPress). This is worrisome and a major Server Security Risk.
Update your PHP Version (How to switch between versions on your cPanel)
If you are on a WordPress host that uses cPanel, you can usually switch between PHP versions for your host cPanel as a method to update your server-side software. Before performing any update on your website or host configurations, remember to back up the site first to an external location in case the new update breaks your existing site due to redundancies due to code compatibility issues.
- Login to your hosting cPanel
- Locate the MultiPHP Manager tool in the Software section of your cPanel.

- Click the checkbox for the domain(s) that you want to adjust.
- From the drop-down menu labeled PHP version, select the PHP version that best suits your site code.
Update your WordPress Core, Themes and Plugins
Updating your Server software to the latest version is not sufficient to stop you from being hacked. Hacking may occur when you use out of date code in your WordPress core, plugins, and themes. Unfortunately, about 50% of WordPress websites in existence are running on out-of-date software. Most websites owners have refused to update their site for the fear of breaking it up. However, not updating the website core, plugins and themes may lead to them being hacked. Note that, websites break mostly because of bugs in older WordPress versions. However, if your theme and plugins are already updated, you should be fine as WordPress.
Beware of Plugins and Themes:
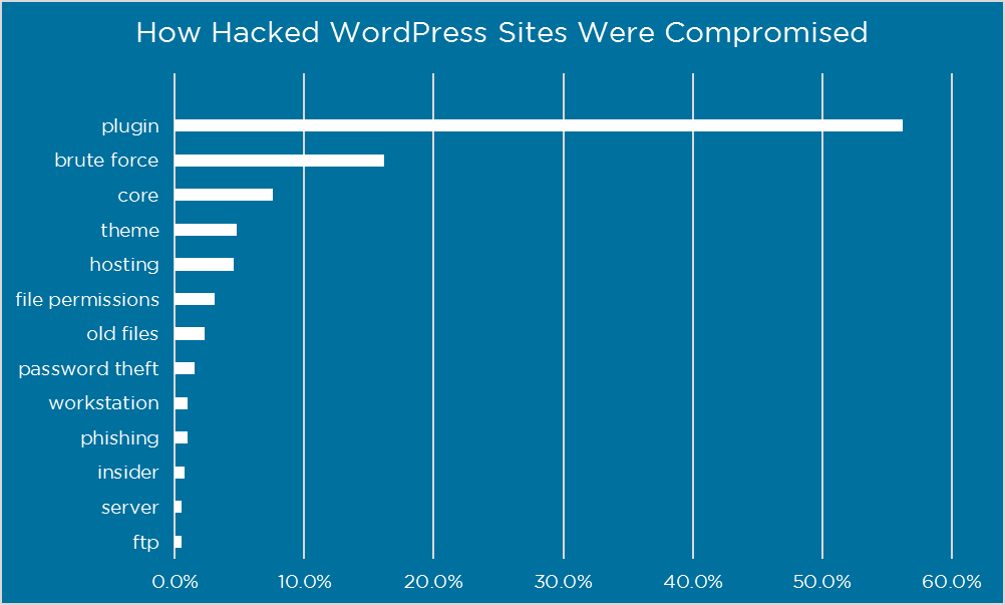
While WordPress gets its core features from Plugins and Themes. Data shows that Plugins and Themes are Your Biggest Risk; in a survey of 1,032 respondents, it was discovered that plugin vulnerabilities represented 55.9% and Theme vulnerabilities represented less than 10% of the known entry points for hackers and spammers. We strongly discourage any use of nulled WordPress plugins and themes.
Some tips for avoiding plugin vulnerabilities:
- Keep your plugins and themes updated
- Enable Automatic Updates for your Plugins
- Only download plugins and themes from reputable sites (Avoid nulled plugins or themes) – One of the easiest ways for attackers to compromise your website is to trick you into loading malware yourself. An attacker will do this by setting up a website that looks legitimate and getting you to download a compromised or ‘nulled’ plugin.
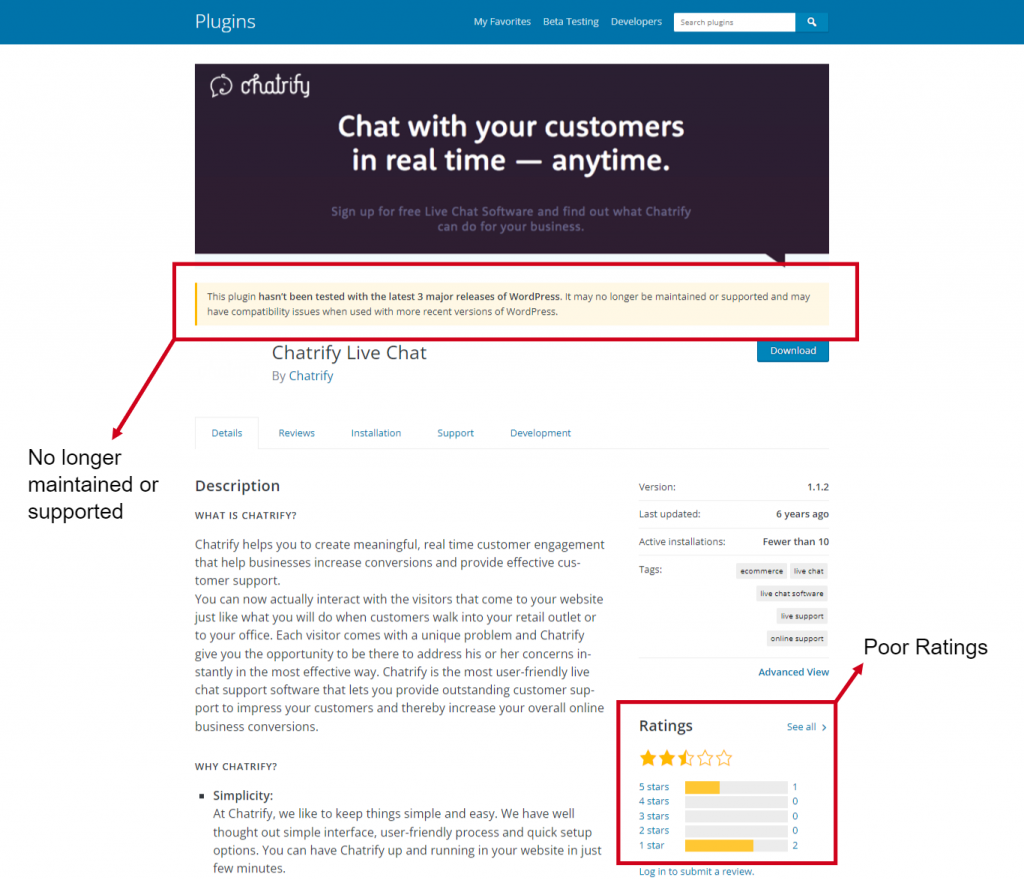
Look out for active Plugin or Theme Support
Even when if you only get your plugins directly from the WordPress official directory, Avoid Plugins or themes that are no longer maintained or supported. Look at the “Last Updated” date and the number of positive ratings a plugin has, if the plugin is out-of-date and/or has bad ratings, that should be a red flag concerning the security of the plugin.
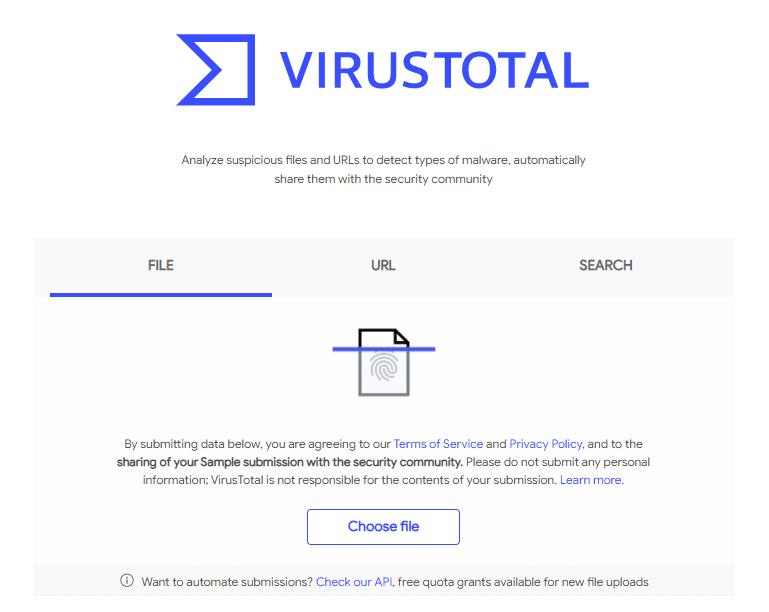
- You should always scan your plugins and theme files with an online tool like VirusTotal to see if it detects any type of malware.
There are a ton of resources available to keep you informed about the latest WordPress security updates and vulnerabilities in plugins, themes and even the WordPress Core:
- WP Security Bloggers: high-quality WordPress security & management utility plugins to help administrators better manage & secure their websites
- WordFence Vulnerability Database: Catalogs over 10,000 WordPress Core, Plugin and Theme vulnerabilities daily.
- Patchstack Vulnerability Database: Daily updated database of WordPress plugins, themes, and WordPress core vulnerabilities.
- Official WordPress Security Archive
Use strong Usernames and Passwords
The goal with your username and password is to make it difficult for other people to guess and hard for a brute force attack to succeed. Whether it is your Host account, database, or WordPress admin username or password, always use secure character combinations to prevent your website from being hacked by social engineering, brute force or dictionary attack, and other malicious methods.
Best Password Security Tips
- Use a password that has at least 16 characters, use at least one number, one uppercase letter, one lowercase letter and one special symbol.
- Do not use the names of your families, friends or pets in your passwords.
- Do not use any dictionary word, Postal codes, house numbers, phone numbers, birthdates, & etc. in your passwords
- Do not use the same password, security question and answer for multiple important accounts.
- Any numeric-only or alphabetic-only password (a mixture of both is best).
- Use a Password Generator to automate step 1 – 5
- Turn on 2-step authentication whenever possible.
- Do not store your critical passwords as text in the cloud.
- Protect your computer with firewall and antivirus software, block all incoming connections and all unnecessary outgoing connections with the firewall.
- Store passwords securely. Do not store them in plaintext in a document online that may be compromised. You can use a product like 1Password which provides an encrypted ‘vault’ to store your passwords in
A strong password is necessary not just to protect your blog content. A hacker who gains access to your administrator account can install malicious scripts that can potentially compromise your entire server.
Top Username Security Tips
Passwords are the most important factor for securing your accounts. But you need to pay attention to your usernames as well. But how can you choose a more secure username? A security expert, Chad Hammond, from NordPass (a company that Securely Store, Manage & Autofill Passwords) offers the following tips:
- Don’t just use your name as a username.
- Dont use obvious name. The most obvious usernames to avoid are ‘Admin’ and ‘Administrator’, they are the most common usernames attempted in brute force attacks. Also avoid using your domain name, company name and the names of people who are writing for your blog or are listed elsewhere on your website.
- Avoid using the beginning of your email address as your username.
- Your username should be simple enough to remember but hard to guess.
- Never use easy-to-guess numbers with your usernames (for example, address or date of birth).
- Don’t use your Social Security number or ID number as your username.
- Automate Tip 1 – 6 with an online username generator.
Fortify your WordPress Admin access
Change your Default Admin and Login URLs
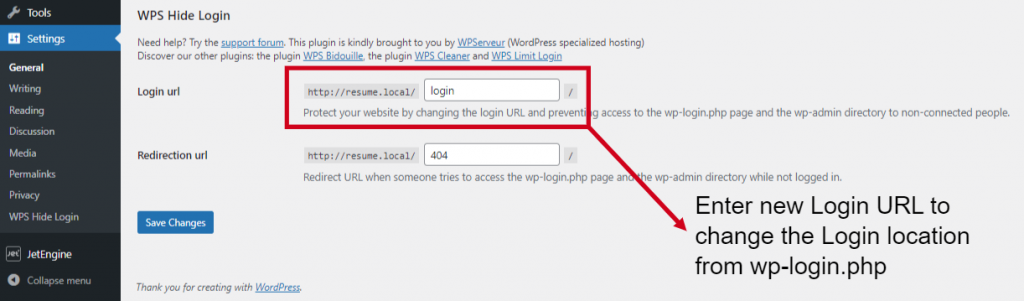
The fastest way to fortify your WordPress admin Access is by changing the Login and Admin Area URL. The default login URL (yourwebsite.com/wp-admin) and the default admin URL (yourwebsite.com/wp-admin). The problem here is that malicious scripts used by hackers are directly programmed to target these URLs. By changing these URLs you can make yourself less of a target and better protect yourself against brute force attacks.
FREE Plugins like WPS Hide login can be used to safely change the URL of the login form page to anything you want on your general settings area. It doesn’t rename or change files in the core, nor does it add rewrite rules. It simply intercepts page requests. The default wp-admin directory and wp-login.php file automatically becomes inaccessible.
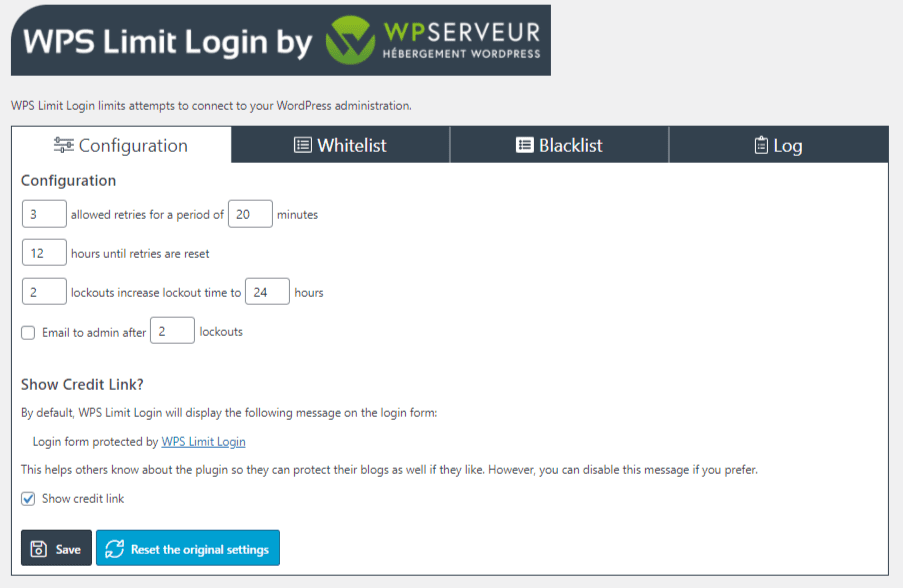
How to Limit Login Attempts
WordPress by default allows unlimited login attempts either through the login page or by sending special cookies. This allows passwords (or hashes) to be cracked via brute-force relatively easily. Free plugins like WPS Limit login blocks an Internet address from making further attempts after a specified limit on retries has been reached, making a brute-force attack difficult or impossible.
Password Protecting wp-admin folder and wp-login.php file with HTTP Authentication
Another way to protect your WP Admin area is to add HTTP authentication. This way, both username and password are required before being able to even access the WordPress login page. This strategy is very effective against bots, however, it might present an inconvenience issue for your users in a membership or e-commerce website.
Protecting your wp-admin folder in your Apache Web Server
To protect the contents of a specific folder, like the wp-admin folder, a .htaccess the file is placed in the directory you want the contents of the file to affect. The rules and configuration directives in the .htaccess file will be enforced on whatever directory it is in and all sub-directories as well. A typical .htaccess file looks like the following:
AuthUserFile /path/to/wp-admin/.htpasswd
AuthType Basic
AuthName "My Restricted Area - Admins Only"

#Allow any valid user
require valid-user
The .htaccess file contains a path to a .htpasswd file; you can manually create a .htpasswd file and then upload it to the wp-admin folder of your WordPress Install. The .htpasswd file contains rows corresponding to a pair of usernames and passwords separated with a colon character. The password is encrypted using the UNIX system’s crypt method and may use MD5 or SHA1. You may use a htpasswd generator to create a password for your .htpasswd file.
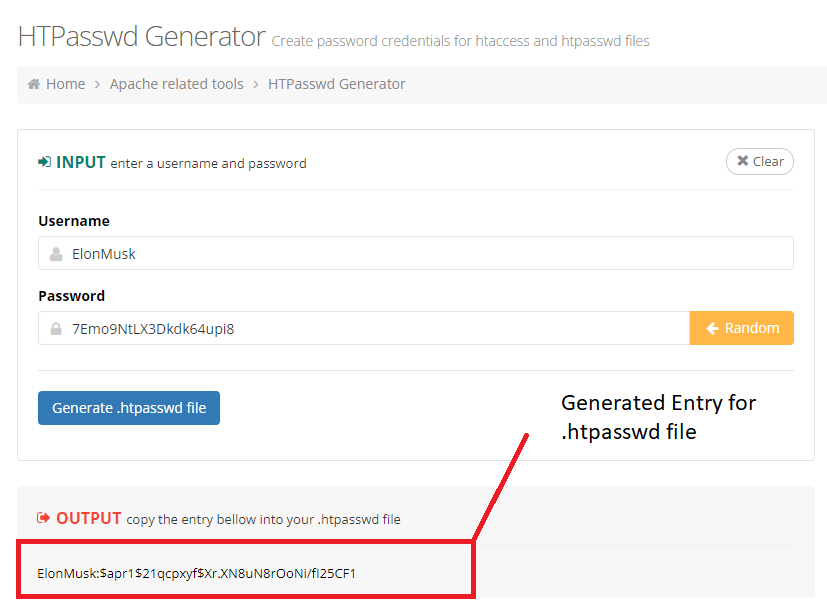
The corresponding .htpasswd file must be placed in the folder defined by the AuthUserFile directive in the .htaccess file. In that case, it will be located in the “/path/to/wp-admin/.htpasswd” directory. A typical .htpasswd file looks like the following:
ElonMusk:$apr1$21qcpxyf$Xr.XN8uN8rOoNi/fI25CF1
JohnDoe:$apr1$l76zf4jy$M7064lZwDjJjGigJ48fqP/
JuliaRoberts:$apr1$f2dmapgz$C.8mBkD1DoUiBVJGaCfJM0
Once set up, a user wishing to access a restricted directory will be requested a username and password pair to gain access. Only correct pairs will grant access to the requested directory.
NB: For those sites where admin-ajax.php is e.g. behind a .htaccess or running on SSL. and you discover that your site’s frontend admin-ajax (sometimes required by some themes and third-party plugins) is broken as a result of the .htpasswd file setup; You can resolve this issue, by simply removing admin-ajax.php from your restrictions by doing something like the code below to your .htaccess file:
<Files admin-ajax.php>
    Order allow,deny
    Allow from all
    Satisfy any
</Files>
Protecting your wp-admin folder in your NGINX Web Server
Similar to HTTP restrictions on Apache, You can restrict access to your website or some parts of it by implementing a username/password authentication. For more information, refer to this Tutorial on Restricting Access with HTTP Basic Authentication
Protect the wp-includes folder
The wp-includes folder is another location where scripts are generally not intended to be accessed by any user. One way to do that is to block those scripts using mod_rewrite in the .htaccess file. Note: To avoid an override of changes made to the .htaccess by WordPress updates, place the code below outside the # BEGIN WordPress and # END WordPress tags in the .htaccess file. WordPress can overwrite anything between these tags.
# Block the include-only files.
<IfModule mod_rewrite.c>
RewriteEngine On
RewriteBase /
RewriteRule ^wp-admin/includes/ - [F,L]
RewriteRule !^wp-includes/ - [S=3]
RewriteRule ^wp-includes/[^/]+\.php$ - [F,L]
RewriteRule ^wp-includes/js/tinymce/langs/.+\.php - [F,L]
RewriteRule ^wp-includes/theme-compat/ - [F,L]
</IfModule>
Note that this won’t work well on Multisite, as RewriteRule ^wp-includes/[^/]+\.php$ - [F,L] would prevent the ms-files.php file from generating images. Omitting that line will allow the code to work, but offers less security.
Enable Two-Factor Authentication
How Does Two-Factor Authentication (2FA) Work?
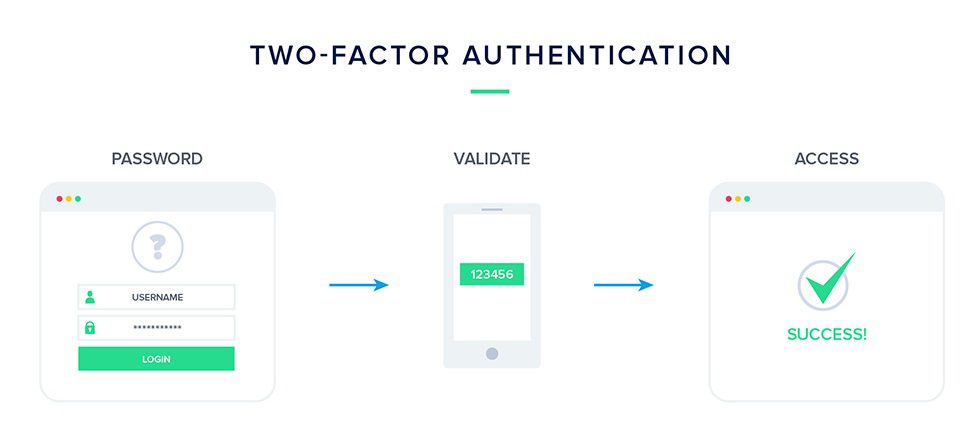
Enabling Two-Factor Authentication (2FA) is one of the best security best practices you can employ as it protects you even in cases of platform-level hacks when the passwords get exposed. 2FA works by adding a layer of security to your online user accounts. It requires an additional log-in credential – beyond just the username and password – to gain account access.
You may choose to set up 2FA on your WordPress Hosting Account and your Actual WordPress Website.
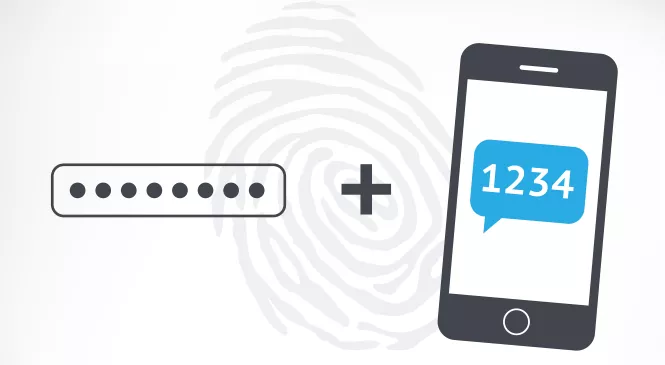
When you add two-factor authentication on your WordPress Host or any online account, depending on the login requirements, users may need to enter their username and password like normal. Then, they’ll need to provide another piece of verification information that proves it’s them logging in. It is generally a text (SMS), phone call, or time-based one-time password (OTP) sent to them.
Why are we elongating the Login Process? Well, it’s because it is almost impossible that the attacker will have both your password and your cellphone to get the 2FA data. This way, they can’t log in, even if they have your actual username and password.
How to Enable 2FA on your WordPress Site
It is recommended that your WordPress administrator user has two-factor authentication (2FA) enabled for their user roles, you may also enforce 2FA on other roles like Editor or Author. Below are some recommended plugins to enable 2FA on your WordPress website.
- WP 2FA plugin
- miniOrange’s Google Authenticator – WordPress Two Factor Authentication (2FA , MFA, OTP SMS and Email) | Passwordless login
- Two Factor Authentication
- Duo Two-Factor Authentication
Most of these WordPress 2FA plugins work with popular 2FA code generator mobile apps, while others may require that you install their custom 2FA code generator apps on your phone.
- Android Google Authenticator App
- iPhone Google Authenticator App
- Android Duo Mobile App
- iPhone Duo Mobile App
Use HTTPS – SSL Certificate
What is HTTPS and SSL Certificate
HTTP (HyperText Transfer Protocol) is a transmission method that allows web applications to transfer data between the browser and the webserver. Without a secure protocol in place, the website transports data using the default HTTP. This means that every time a user logs in or uses their credit card, that sensitive data is being passed to the server in plain text. It is not secure! Your login or card information can be hijacked in the process of being transported from the Browser to the Server via a man-in-middle-attack. This security flaw can be resolved with the addition of an SSL Certificate
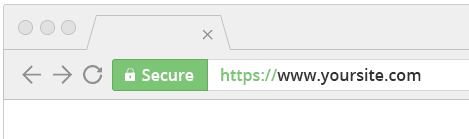
An SSL or Secure Sockets Layer provides a digital certificate that authenticates a Website’s identity and creates an encrypted connection between the Browser and the Webserver. SSL adds a secure layer to the default HTTP transmission method. when SSL is enabled you will notice the addition of an “s” to the website’s HTTP method on the URL. The URL now begins with HTTPS instead of just HTTP. This is usually indicated by the presence of a padlock icon on the site information area of your browser.
Selecting the right Site’s SSL for your website: FREE SSL vs Paid SSL
There are two categories of SSL certificates. The first one is the ‘Free SSL Certificate’, which is available for free. The other one which is paid is simply known as ‘SSL Certificate’ usually signed by a Trusted Certificate Authority (CA). As far as the level of encryption is concerned, a free SSL certificate provides the same level of encryption as the paid ones.
Free SSL certificates fit into two categories. ‘Self-Signed Certificates’ and ‘CA-Signed Free Certificates‘. The self-signed certificates are not signed by a CA at all – neither private nor public. In this case, the certificate is signed with its own private key, by the issuer itself, as opposed to requesting its public or a private key from a CA. On the other hand, a CA-Signed Free Certificate as you may have deduced is an SSL Certificate that gets its public or a private key from Trusted CA. Note that even though both FREE and Paid SSL have the same level of encryption, FREE SSL only comes with the basic Domain Validation (DV) option, there are some Risk factors involved when using a FREE SSL Certificate.
Paid SSL Certificates on the other hand offers a longer validity period and a verified/guaranteed trust level beyond the Basic Domain Validation. Depending on your budget, Paid SSL is highly recommended but for one con: it is very expensive and may cost anywhere from $15/yr to $200/yr depending on the Type of Paid SSL Certificate you choose.
Migrating from HTTP to HTTPS: Setting up a FREE SSL Certificate on your WordPress site
A nonprofit, Free, automated Certificate Authority (CA) called Let’s Encrypt with a mission to create a more secure and privacy-respecting Web by promoting the widespread adoption of HTTPS is one of the leading CAs providing FREE SSL to almost 300 million websites globally. Most of the Top Webhosting Companies offer FREE SSL from Let’s Encrypt. Manually setting up an SSL Certificate can get complicated. Luckily, using the following plugins, you can install Let’s Encrypt’s FREE SSL on your WordPress website:
- Really Simple SSL
- SSL Zen – Free SSL Certificate & HTTPS Redirect for WordPress
- One Click SSL
- Easy HTTPS Redirection (SSL)
- WP Force SSL
- SSL Insecure Content Fixer
At this point, I should mention that SSL is obsolete and is being replaced by a Transport Layer Security (TLS) protocol. both TLS & SSL connects to HTTPS, however, TLS is more secure and way faster than SSL. But not to worry, you may already be using TLS by merely using anyone of the above plugins. For more information about TLS/SSL in HTTP to HTTPS migration, Check out this article: TLS vs SSL: an in-depth Guide to HTTPS Migration
Use SFTP not FTP for File Transfer
When connecting or transferring files from your computer to your server you should use SFTP encryption if your web host provides it. If you are unsure if your web host provides SFTP or not, just ask them.
Using SFTP is the same as FTP, except your password and other data is encrypted as it is transmitted between your computer’s browser and your website server. This means your password is never sent over the internet in plain text and cannot be intercepted by an attacker.
Supercharge your wp-config.php file
One of the most important files in your WordPress installation is the wp-config.php file. it’s basically the artery of your WordPress Installation. The wp-config.php file is located in the root of your WordPress file directory and contains your website’s base configuration information, like database connection, authentication keys and salts which can be used in any number of potential hijacking attacks. Here are a few measures you can use to protect and supercharge your wp-config.php file
- Move your wp-config.php file away from your Web Root
The first responsible step to securing your wp-config.php file is to move from the default WordPress root directory. The wp-config.php can be stored ONE directory level above the WordPress (where wp-includes resides) installation. Also, make sure that only you (and the webserver) can read this file (it generally means a 400 or 440 permission). Take the following measures to move your wp-config.php file:
First, create a new directory (For this example, I’ll name the directory: newSecureDirectory ; however, you can name it whatever you want). Now, move your current wp-config.php file into the newSecureDirectory
Go back to your root directory, create a new wp-config.php file, then paste and save the code below into it. Ensure that you change the directory path to match the name of the new directory holding the wp-config.php file.
<?php

/** Absolute path to the WordPress directory. */
if ( !defined('ABSPATH') )
    define('ABSPATH', dirname(__FILE__) . '/');

/** Location of your WordPress configuration. */
require_once(ABSPATH . '../newSecureDirectory/wp-config.php');
Finally and most importantly, go to your Host account cPanel File manager, then change the newSecureDirectory permissions to either 400 or 440. in order to disable third-party read or write access to the folder. That’s it, all done! Learn more on How to Assign Permissions to Files and Folders in cPanel or contact your Host for directions.
NB: Depending on your server, insert the code below into your .htaccess file (at the very top) to deny access to anyone surfing for it the wp-config.php:
<files wp-config.php>
order allow,deny
deny from all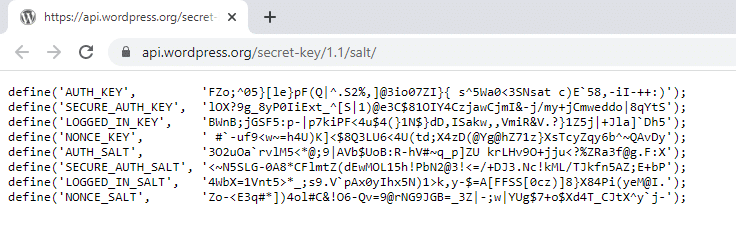
</files>- Update WordPress Security Salts and Keys
You don’t have to change the Security Salts and Keys, WordPress automatically generates these for you. However, if you have gone through multiple migrations or purchased a site from someone else, it is wise to generate new WordPress keys. You don’t have to remember the keys, just make them long, random and complicated.
The WordPress API has an online salt generator you can use to securely create random keys. You can update these at any time to invalidate all existing cookies. This means that all logged in users will have to log in again after the salt update.
Please make sure you practice regular backups and know how to restore them before modifying these settings.
- Change wp-config.php permissions
The permissions on the wp-config.php file should be set to 440 or 400 to prevent other users on the server from reading it. You can easily change this with your FTP client or in your Control Panel’s File Manager.
- Disable File Editing
WordPress defines a constant to disable editing from Dashboard. Placing this line in wp-config.php is equivalent to removing the ‘edit_themes’, ‘edit_plugins’ and ‘edit_files’ capabilities of all users:
define('DISALLOW_FILE_EDIT', true);This will not prevent an attacker from uploading malicious files to your site, it may however stop some attacks.
- Enforce Admin SSL
To enforce a secure, encrypted connection between your browser and the webserver when logging into your site as an Admin, add the following line to your wp-config.php file:
define('FORCE_SSL_ADMIN', true);
Disable the XML-RPC API
RPC stands for Remote Procedure Call which means you can remotely call for actions to be performed, while XML stands for Extensible Markup Language and is used to encode the data that needs to be sent.
XML-RPC is a WordPress feature responsible for enabling remote WordPress applications on your smartphone or other devices to send data to your WordPress website. XML-RPC is designed for users to publish content in large volumes. So, if you want to publish an article on your WordPress website via the WordPress app, XML-RPC is what enables you to do that.
Is XML-RPC Dangerous and Why should it be disabled?
XML-RPC is not dangerous, However, request created by XML-RPC, whenever you want to publish content from a remote device, goes through basic authentication via a simple username and password check. If a hacker has access to your username and password, they could use it to access your website, send bulk malicious requests and even perform a DDOS or Distribute Denial of Service attack (overwhelming the target website by sending pings from thousands of other compromised sites). Even if hackers don’t have your username and password, they can use the XML-RPC system.multicall function to make multiple login brute force attempts using thousands of passwords under a hundred requests, all in a bid to guess your username and password.
When NOT to disable XML-RPC?
DO NOT disable xmlrpc.php if:
- you plan to create remote custom mobile apps or use the WordPress app or any other remote connections to publish content on your website and do not intend to use the WordPress REST API for your remote connections.
- you use plugins that like JetPack that depend on XML-RPC API to function.
Other than for the above reasons, I strongly recommend that you disable XML-RPC.
An argument can be made that the WordPress REST API is a better way to remotely interact with your WordPress website.
How to Disable XML-RPC
Here are a few ways to disable XML-RPC.
- Disable XML-RPC with a Plugin
There are many plugins that can disable XML-RPC on your WordPress website. However, The Disable XML-RPC plugin presents a straightforward way to automatically and completely deactivate the XML-RPC API. if you choose to enable XML-RPC for any reason, simply deactivate the plugin. However, you may not need the Disable XML-RPC Plugin or any other plugin if you are using a Web Application Firewall (WAF), because disabling XML-RPC is automatically taken care of.
- Disable XML-RPC directly using .htaccess code
The .htaccess method is the best way to disable XML-RPC because it’s the least resource-intensive. Visit your web host file manager and start editing the .htacess file.
#deny xmlrpc.php request
<files xmlrpc.php>
order allow,deny
deny from all

#allow specific IP Address
#allow from xxx.xxx.xxx.xxx

</files>
If your host uses cPanel and you can’t find the .htacess file, visit settings and click on ‘show hidden files.’
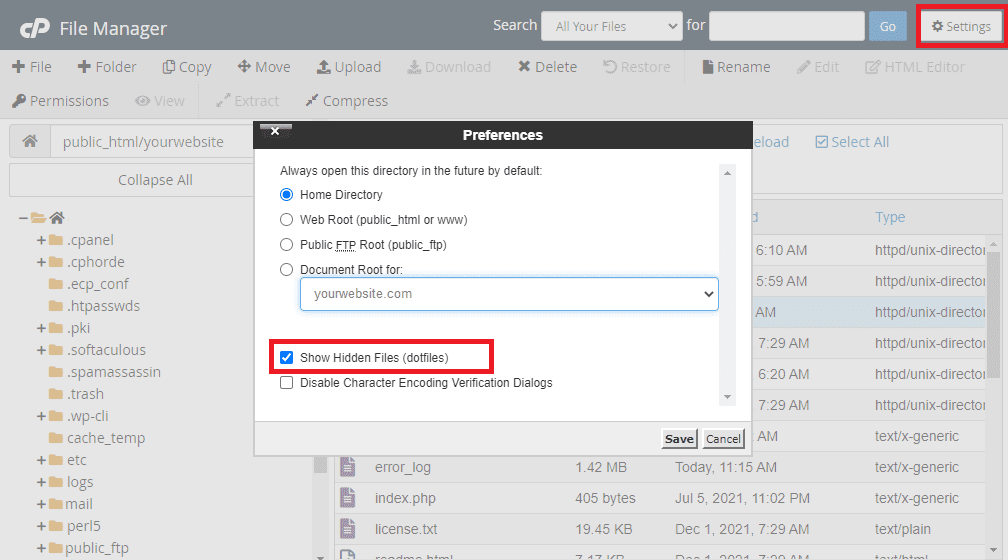
If after showing hidden files, you discover that your website doesn’t have a .htaccess file, you can create one. Use the ‘+File’ option on the top-left corner of the screen.
Security through Obscurity: Hide your WordPress version
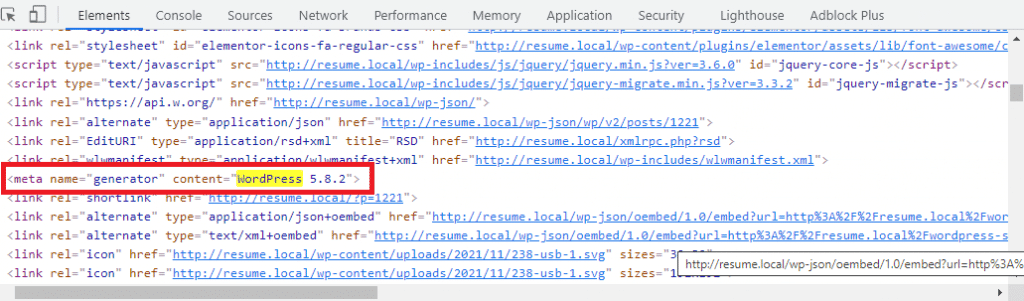
Security through obscurity is generally not considered an efficient security strategy. However, the less other people know about your WordPress site’s configuration the better. For example, by default, your WordPress website exposes the WordPress version in the header of your page or RSS Feed. Some malicious bots scan and target specific versions of WordPress, and may be used as a confirmation to proceed with a specific known exploit on that version. However, a good hacker can still crack your site’s security irrespective of the code version; such security measures are only to eliminate the lazy efforts of script kiddies and newbie hackers.
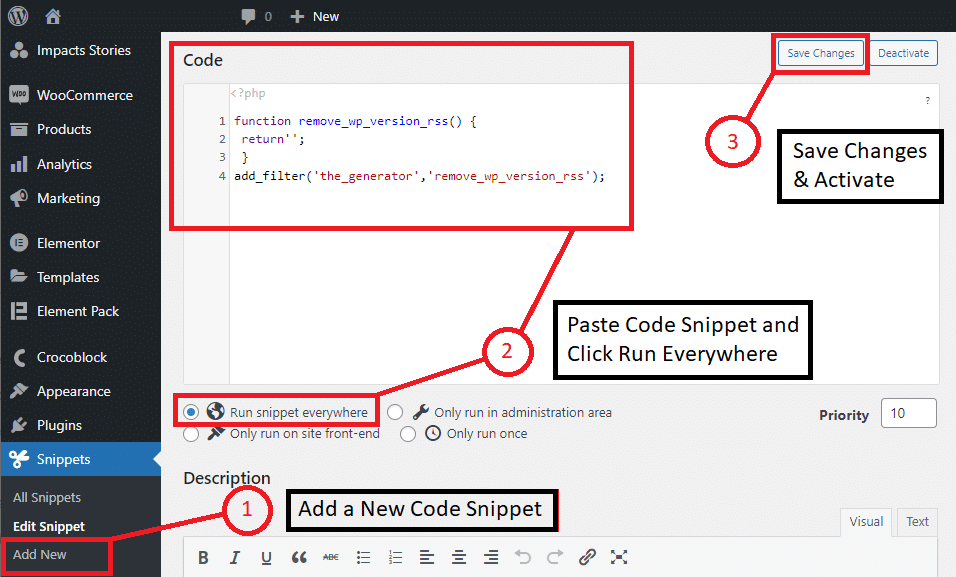
To remove the WordPress version from showing up in your generated page HTML, simply add the following code to the functions.php file of your WordPress child theme. It is recommended that you use your website’s child theme’s function.php because the default theme’s functions.php of your website will be overwritten with every theme update.
function remove_wp_version_rss() {
 return'';
 }
add_filter('the_generator','remove_wp_version_rss');
if you are not using a child theme, you can also achieve the same results using a plugin called Code Snippets. Code Snippets is an easy, clean and simple way to run code snippets on your site. It removes the need to add custom snippets to your theme’s functions.php file. it changes that by providing a GUI interface for adding snippets and actually running them on your site just as if they were in your theme’s functions.php file.
Modify the HTTP Security Headers
Headers specify how the data transmitted between the browser and server(s) are encoded; session identification and verification, client detection (such as browser cookies, user-agent, user-agent spoofing, IP address, VPN and proxies etc), and also how the server should handle data tracking, downloaded document age, amongst others things.
HTTP response status codes are issued by the server every time a client’s request is made to that server. Security Headers blocks common malicious activity (like click-jacking, cross-site scripting, brute force attacks, and more) from affecting your website performance.
The normal header response issues a status called HTTP 200. After which your website loads in the user’s browser. However, if your website is having difficulty then your web server may send a different HTTP header such as Error 500 (Internal Server Error) or Error 404 (Page not found).
There are different HTTP security headers, but below are typically the most important ones.
- Content-Security Policy (CSP)
- X-XSS-Protection
- HTTP Strict Transport Security (HSTS)
- X-Frame-Options
- X-Content-Type
- Referrer Policy
- Feature-Policy
- CORS headers
Content Security Policy (CSP)
Content Security Policy (CSP) is a Security configuration that prevents a variety of frontend code injection vulnerabilities like Cross-Site Scripting (XSS) by using directives to define approved content sources before they can be loaded in the browser. If you don’t have a defined CSP, the browser will load all files to the page irrespective of whether or not the source is harmful.
CSP can be added to the .htaccess file using the following syntax:
Content-Security-Policy: <policy-directive>; <policy-directive>where <policy-directive> consists of: <directive> <value> with no internal punctuation. Below is an example of the syntax implementation on the header of the website on Apache and Nginx server:
For Nginx Server
Header add Content-Security-Policy "default-src 'self'; script-src 'self' https://*.googleapis.com;"For Apache Server
Header set Content-Security-Policy "default-src 'self'; script-src 'self' https://*.googleapis.com;"In the above example, The CSP will only allow scripts from the current domain (with <value> set to 'self') as well as https://*.googleapis.com . The CSP should be placed with all other security headers between <ifModule mod_headers.c> and </ifModule>
Before setting up your final CSP, I would recommend that you first monitor (without enforcing the policy) the effects of the new content policy, by replacing Content-Security-Policy with the Content-Security-Policy-Report-Only response header. That is,
Header set Content-Security-Policy-Report-Only "default-src 'self'; script-src 'self' https://*.googleapis.com;"The report based on your Website’s new CSP directives can be found in your browser’s console.
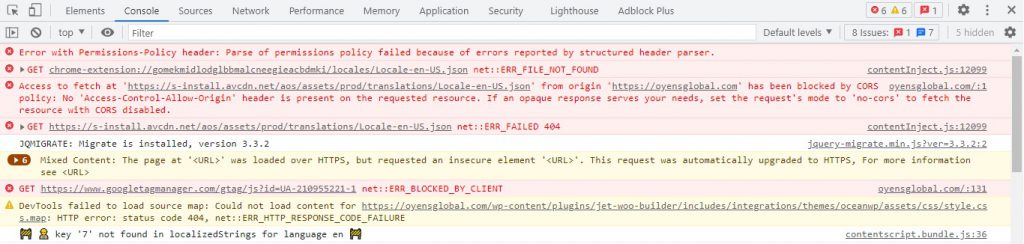
If you find your new CSP favourable, remove the -Read-Only suffix from Content-Security-Policy keyword in the header to enforce the new policies. Haven configured your CSP, you can now monitor the content that violates your security policy.
Setting the CSP header configuration may seem a little tedious since there is no exact standard recommendation for its directives because it depends on the resources (CSS, JS, Fonts & etc) used by each particular website/page. Content Security has many Directives that can be used to modify the Policy based on how you want to enforce secure content sources. Below are some common CSP Settings – You may need to edit your policy sources:
#Setting Content Security Policies
Header set Content-Security-Policy "default-src 'none';"
Header set Content-Security-Policy "script-src 'self' www.google-analytics.com ajax.googleapis.com"
Header set Content-Security-Policy "script-src-elem 'self' https://www.googletagmanager.com;"
Header set Content-Security-Policy "style-src 'self';"
Header set Content-Security-Policy "style-src-elem 'self' https://fonts.googleapis.com;"
Header set Content-Security-Policy "font-sec 'self'"
Header set Content-Security-Policy "media-src 'self'"
Header set Content-Security-Policy "img-src 'self'"
Header set Content-Security-Policy "connect-src 'self';"
Header set Content-Security-Policy "frame-ancestors 'self';"
Header set Content-Security-Policy "object-src 'self';"
Header set Content-Security-Policy "child-src 'self'"
Header set Content-Security-Policy "block-all-mixed-content"
Note that, It is generally not advisable to use unsafe-inline . However, if your website has legitimate inline scripts or styles running, you may use unsafe-inline wrapped around single quotes ' ' , but done in combination with a strict-dynamic directive. Where strict-dynamic (CSP Level 3+) is used, the unsafe-inline is ignored, and provides a route to backwards compatibility on browsers that support CSP Level 2 or lower. Do not use unsafe-inline if you don’t know what you’re doing.
X-XSS-Protection
X-XSS-Protection is used to protect your web applications against Cross-site Scripting (XXS) attacks, Simply known as javascript injections. Most modern browsers stop XXS attacks when the site implements a good Content-Security-Policy since the issue of script source or unsafe-inline scripts has been securely defined.
X-XSS Protection Syntax on Apache Server
#Enable XSS filtering. Prevent rendering of the page if an attack is detected.
Header set X-XSS-Protection "1; mode=block"
X-XSS Protection Syntax on Nginx Server
add_header "X-XSS-Protection" "1; mode=block";
Although X-XSS Protection secures users with older CSP incompatible browsers from Cross-site scripting, according to the Chrome, Firefox, and Edge Browser teams, XSS Protection in some cases “can introduce cross-site vulnerabilities as mechanisms to bypass the Auditor or Filter are widely known”. Thus, If your site does not Support Legacy (outdated) Browsers, it is recommended that you stick-to Content-Security-Policy without allowing unsafe-inline scripts instead of X-XSS Protection.
HTTP Strict Transport Security (HSTS)
The Strict-Transport-Security header is used to enforce web browsers access to web servers solely over HTTPS. This ensures that all connections are only established through a secure HTTPS and not an insecure HTTP connection. So, if an insecure request is initially made via HTTP, but then redirected to HTTPS, your HSTS policy will ensure that such a request is never honoured because a man-in-the-middle attack can be injected between the point of redirection between HTTP and HTTPS.
Your HSTS policy should look somewhat like this:
Header always set Strict-Transport-Security "max-age=31536000; includeSubDomains; preload" env=HTTPS
Here, the browser is instructed that it must only access your site via HTTPS over a period of 31,536,000 seconds (1 year), and this rule applies to all corresponding subdomains. The preload directive is used to request that your site is added to list of HTTPS Secure sites. These sites are hardcoded into Chrome, FireFox and other browsers as being HTTPS only access. Do not used the preload directive if you intend to access certain subdomains via HTTP. There are Submission Requirements to join the preload list, like having a valid SSL certificate or redirecting HTTP to HTTPS on thesame host.
Forcing SSL
Although the following code below may not be needed as it may already be enforced of if you use an autoSSL plugin, its however important to note that part of your HSTS preload requirements is forcing HTTP to HTTPS redirection by adding the following lines of code to your .htacccess file
<IfModule mod_rewrite.c>

RewriteCond %{HTTP:X-Forwarded-Proto} !=https
RewriteRule .* https://%{HTTP_HOST}%{REQUEST_URI} [R=301,L]

</IfModule>
Google has a tool to check your website’s preload eligibility or you can simply check your status or the status of any website in chrome (chrome://net-internals/#hsts). Once you enable HSTS, you are committed to SSL. You will not be able to go back to plain insecure HTTP for your website until the period specified is over.
X-Frame-Options
X-Frame-options is used to prevent Clickjacking attacks. Clickjacking is an attack that tricks a user into clicking a webpage element which is invisible or disguised as another element. This can cause users to unwittingly download malware, visit malicious web pages, provide credentials or sensitive information, and much more.
X-Frame-Option has two directives, X-Frame-Options: DENY and X-Frame-Options: SAMEORIGIN
if you choose DENY, all attempts to load content in an iframe will fail irrespective of content source. But, if you use the SAMEORIGIN directive, you can still use the page in a frame as long as the site including it in a frame is the same as the one serving the page.
To configure Apache to send the X-Frame-Options header for all pages, add this to your site’s configuration:
Header always set X-Frame-Options "SAMEORIGIN"
OR
Header aset X-Frame-Options "DENY"
To configure x-frame-options on Nginx,
add_header X-Frame-Options SAMEORIGIN always;
Your Final Security Header Settings
Your Security Header Settings in the .htaccess file should look somewhat like this:
<ifModule mod_headers.c>
#Begin Headers

Header set Content-Security-Policy "default-src 'none';"
Header set Content-Security-Policy "script-src 'self' www.google-analytics.com ajax.googleapis.com"
Header set Content-Security-Policy "script-src-elem 'self' https://www.googletagmanager.com;"
Header set Content-Security-Policy "style-src 'self';"
Header set Content-Security-Policy "style-src-elem 'self' 'unsafe-inline' https://*.googleapis.com;"
Header set Content-Security-Policy "font-sec 'self'"
Header set Content-Security-Policy "media-src 'self'"
Header set Content-Security-Policy "img-src 'self'"
Header set Content-Security-Policy "connect-src 'self';"
Header set Content-Security-Policy "object-src 'self';"
Header set Content-Security-Policy "child-src 'self'"
Header set Content-Security-Policy "block-all-mixed-content"

#CORS
Header set Access-Control-Allow-Origin: "https://www.example.com"
Header set Access-Control-Allow-Methods: "GET,POST,OPTIONS"
Header set Access-Control-Allow-Headers: "Upgrade-Insecure-Requests"
Header set Cross-Origin-Embedder-Policy: require-corp
Header set Cross-Origin-Opener-Policy: same-origin
Header set Cross-Origin-Resource-Policy: same-origin
Header set Expect-CT: max-age=0

#Permission Policy
Header always set Permissions-Policy "geolocation=(), midi=(), sync-xhr=(), accelerometer=(), gyroscope=(), magnetometer=(), payment=(), camera=(), microphone=(), usb=(), fullscreen=(self)"

#HSTS - Enfore site and subdomains access over HTTPS for the next 1 year (31536000 seconds) and avoid MITM attacks
Header always set Strict-Transport-Security "max-age=31536000; includeSubDomains; preload" env=HTTPS

#X-XXS Protection
Header set X-XSS-Protection "1; mode=block"

#X-Content-Type-Options
Header set X-Content-Type-Options nosniff

#X-Frame-Options
Header set X-Frame-Options SAMEORIGIN

#Referrer Policy
Header set Referrer-Policy: no-referrer-when-downgrade

#End Headers
</ifModule>